Wednesday, 2 March 2011

Adding texture to the tire


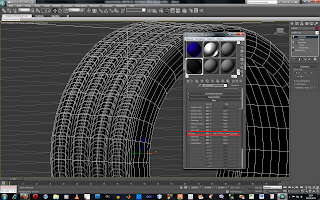
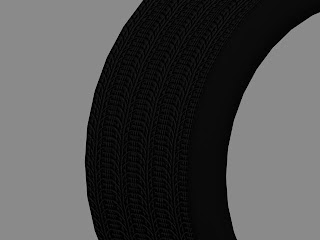
To add tire tread to the outside of the tire I first detched the outer surface of the tire as a seperate element so that only this sruface would be affected by the material. I then opened the material editor tool bar used the bump tool under maps and clicked none to add in the bitmap i had found from the internet of a tires tread.
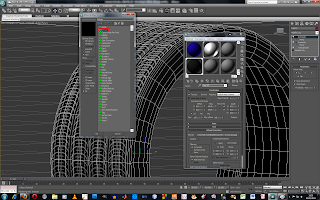
This brings up another tool screen as shown in the picture above. By choosing the bitmap button and clicking ok it then brings up a window with bitmaps that can be used. I chose the correct bitmap and clicked ok.
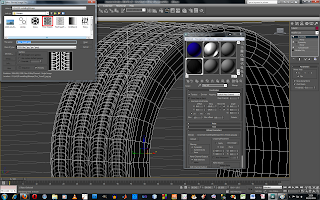
At first the bitmap will not fit on the tire correctly until you tick the real world scale button and use the hieght and width to size the image until it fits correctly to the object. This is shown in the picture below.
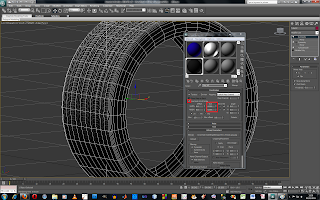
Once this has been doon the size of the bump can be changed by changing the number in the maps menu.
Modelling the Gun


Reference:
Walther PPK pistol fitted with silencer [Image online] Available at: [Accessed 01 Feb 2011]


To model the gun I first drew a long box and then shaped it using the vetex selection button. I also used the extrusion, bridge, cut and connect tools to shape the body of the gun until i was happy that it look like the picture I had found from the internet.

I modelled the gun in the same way as the cars by only modelling half of it and then using the symmetry tool to make both sides of the gun exactly the same.

Once I was happy wit the shape of the body of the gun i moved onto creating the silencer for the gun. To do this I creating a cylinder as a seperate object and then used the extrusion tool to add detail to the object. I then attached this object to the main body of the gun and used the turbosmooth tool to soften the edges of the gun.

Tuesday, 1 March 2011


To finish the cars I used the Turbosmooth tool found the in the modify drop down box. As I only modeled half of the car I also used the symmetry tool to make sure the car was completely symmetrical. To get the symmetry tool to work properly I played around with axis using the extra tool bar and positioned the mirror image in the right position.

Reference:
Freetutorials4you, 2010. 3DS Max tutorial: Modeling car 1 - 64. [video online] Available at: [Assessed 03 Feb 2011]

Driver


To finish the car off i made a simple silhouette of the insdie of the car as well as the driver and the sterring wheel. I created the driver by using the extrude and bridge tools and then shaping him until it looked more realistic.

Creatin the Wheels


To create the wheels I first drew a tire using the tube tool under standard primitives and moved it into place. I then selected the entire outer edge to the tire by using the edge tool and the loop tool. To add more geometry i used the chamfer tool, this created a better curvered edge to the tire. I then selected the middle edge on the fron face of the tire and again used the loop tool to select the whole ring. With this selected i dragged this ring out slightly to create a slight buldge in the tire to make it look more realistic.

To create the wheel itself I then drew another tube, as a seperate object, just inside the tire, however this time I changed the amount of segments there were on the cap face to 60. Once I had shaped this and put it in the right place i then drew a cylinder in the centre of the ring and made sure that this had 30 segments on the cap face and then attaching it to the first object to make them one object. By making the outer ciircle have 60 faces and the inner circle have 30 faces i could accurately place the 5 spindles the same space apart. To do this I simply selected 3 polygons on the inside tube and 3 opposite polygons on the outside tube and then bridged them together creating one og the spindles. I then left a gap of 3 polygons on the inside tube and 9 polygons on the outside tube and repeated the process. I repeated this again 3 more times and the wheel was created. Using the inset tool and extrusion tool I add in the dimensions of the centre of the wheel.

To finish off the wheel i added a brake disc. I did this simply by drawing a cylinder just inside the wheel and adding a box to it to create the calipar.

Wing mirror


To create the wing mirrors of the car i set the view looking straight onto the car and draw a box, as a seperate object, that was slightly bigger than the 2D picture of the wing mirror. I than moved the box into the right postion and converted the box into an editable poly. Using the vertex of the box i shaped it into the shape of the mirror according to the drawings from the top, front and side. Once I was happy with the shape of the mirror I extruded some of the polygons facing the car into the part of the model where the wing mirror should be attached. To extrude these polygons i used the extrude tool which opens up another tool bar in which you can increase and decrease the size of the extrusion and by clicking apply create more than one extrusion to give you more polygons. Making sure that the extrusion was intersecting the side panel of the model I shaped the extrusion to meet the car more smoothly. With the shape of the wing mirror completed I then selected the car model itself and went into the editable poly tool bar and used the attach tool to make the car and the wing mirror one object. I repeated this method to create the grill and other similar features of the car.